Showing posts with label Shoppers' Guide. Show all posts

Thursday, 19 February 2015

The Hunt for Mason Jars etc.


Hi, my name is Ryn, and I'm addicted to glass jars. It's true. I indulged again today when I purchased yet another set of Mason jars (the cute short one on the far right)! In this post, I'm going to indulge myself even more by TALKING about buying jars. It's like having your cake and eating it too!


Say hello to my precious lovelies. From the left:

1. The Vintage Coke Bottle 
2. The Milk Bottle 
3. The Ball Mason Jar (Pint Size)
4. The Pudding Cup
5. The Ball Collection Elite Mason Jar (Half pint)


I don't know if this is common knowledge but the only place in K.L. where I have been to find a true Mason Jar, is ACE Hardware. ACE sells a small range of Ball brand jars in several shapes and sizes. They're beautiful and hardy and amazingly photogenic. They're also crazy expensive for little pieces of glass. For a carton of 12 Pint Sized Mason Jars, you'll fork out RM90 (something!) . For a set of 4 half-pint sized Elite Mason Jars (right), you'll begrudgingly pay RM42.90. Compare this with my little glass Pudding Cup (left), purchased from QualityPack a small shop lot in Puchong, which costs no more than 30sen/piece

Why then would I purchase a Mason Jar you ask?
Well, first, a Ball Mason jar is made out of a much sturdier glass which can withstand most oven baking and freezing without cracking. So far, I've made baked macaroni and chocolate lava cake in my jars without any incidents. They're also perfect for storing homemade ice cream. Meanwhile, the lady at QualityPack advised me not to bake their glass jars unless maybe in a waterbath but I'm too chicken to try. And second, LOOK AT IT! It's sooo pretttyyyyyyy! I rest my case.


Having said that though, these non-branded glass jars have served me well too. The Vintage Coke Bottle (left) I've used for parties to serve individual portions of drinks. The Pudding Cup (right) is great for desserts that don't need to be baked like Chocolate Mousse, homemade beauty products and gifting. Both these glasses are from QualityPack and didn't cost more than 50sen each. They also come in many different sizes so are very versatile. The downside is that you'll have to purchase a minimum of 20 or 30 at a time.

Read this post for details on where to get the Milk Bottle (center).


My Pint Sized Mason Jar in action. It's carrying some homemade chocolate ice cream all ready to be gifted.

Here are the addresses and contact numbers of where to get these jars and more:

No. 52, Jalan Puchong Mesra 1,
Plaza Puchong, Batu 7 1/2 Jalan Puchong,
58200 Kuala Lumpur, Malaysia.
Tel: +60 3 80763800
Fax: +60 3 80753687

Check out their website to find a store near you. I bought mine from the Publika branch but I would call ahead to check if they have the size you're looking for as they often have limited quantities of each type or they may bring in new ones.

Saturday, 10 January 2015

DIY: Fabric Marker Gifts


Over Christmas I did a few of these personalised T-shirts with Sharpie fabric markers and they turned out great! So easy to do and perfect for when you need something personalised but haven't had time to shop. Most of these only take about 20 minutes to do and that's with my non-existent drawing skills.


This was for a friend of mine who is getting married soon! The plain cotton tote is from MUJI and I can't remember exactly but I think it only cost about RM4 on average depending on the size. The fabric Sharpies you can get from almost any stationery or craft store. I bought mine from Art Friend and Popular Bookstore. They come in a set of 4 colours and cost about RM17 a set.


You can freehand it or draw (with a regular sharpie) on a piece of paper first. Some T-shirts are too thick for the paper to show through so you'll have to freehand and hope it all turns out OK.


Place the piece of paper and something thick inside the bag and trace. The marker does seep through sometimes so the backing is a must. Lefties will know why I'm tracing upside down.


It's probably best to press the design with a hot iron to "seal" in the ink but there's no indication on the package that you have to.

I don't know how to match colours without making things look tacky so I almost always go with black. I like these markers because the tip is brush like and very fine so its possible to do very detailed drawings like this cartoon ball-and-chain.

Thursday, 25 September 2014

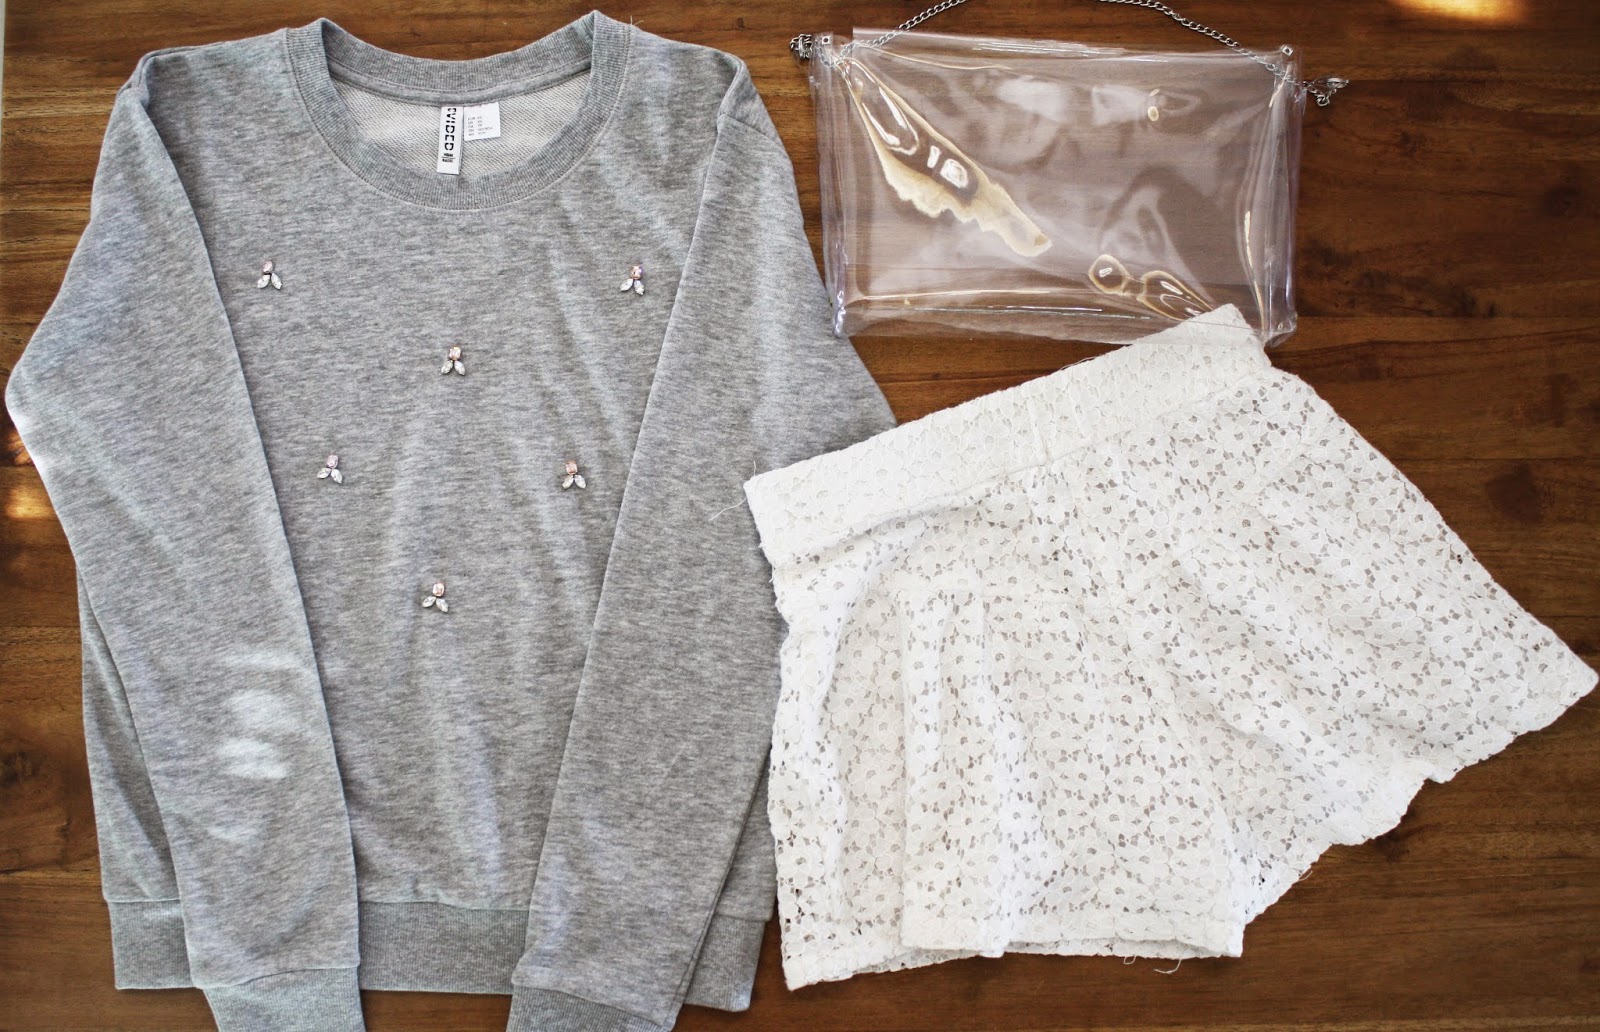
DIY Jewelled Sweatshirt


A while ago I became obsessed with rhinestones. Not the cheap plasticy ones they're always using on clothing at department stores but the real, sparkly, jewellery quality rhinestones. I looked at a few craft stores in KL and PJ but in the end I purchased mine from China via Ali Express. The price was not so much different than purchasing the acrylic ones here (sometimes cheaper compared to stores selling them in packets of 5 or 6) but the quality was so much better. 

Here is an easy DIY to bejewel (be-rhinestone?) your sweatshirt with rhinestones that look 100x more expensive than those you'll find in a mid-range store.

You'll need:
A sweatshirt (I bought mine from H&M for RM49.90)
Rhinestones of different shapes/sizes preferably 
Needle and Thread
Scissors 
Fabric Chalk (optional - you can just wing it)

First lemme show you the stones up close. This photo doesn't really do it justice, but can you see how the light catches it at different angles? At night if you move them around slowly they refract light almost like a disco ball. I'm not an expert on rhinestones but looking at these, I feel certain that they are not acrylic. The acrylic ones in the store are much less shiny and they usually have scratches on them that can add to the dull look. Blegh!

When searching for these on Ali Express, I specifically looked for crystal rhinestones (not acrylic or glass) and I wanted them set in this way with the claws so I looked for sew on and claw setting. In the end I paid something like RM65* for 200 rhinestones including shipping. 


The first step is to spend some time marvelling at your beautiful stones and arrange (and rearrange and rerearrange) them onto your sweatshirt. When you're satisfied with the design then mark some guides with the chalk. Another way to do this is to stick them down with some fabric glue before sewing but I didn't.


The next step is just to hand sew them on one by one. This can be a tedious process. I sew them on individually instead of stringing them all on one thread to avoid puckering and minimise the risk of losing rhinestones.

In the photo above, I'm just showing you how the needle goes through the little holes in the claw setting. You would of course normally sew from the wrong side of the garment up.


Done! You can barely see the white thread.


If you want to order these same rhinestones, follow the links below. The store name is Yiwu XinZun Crystal Accessories on Ali Express.

Mixed Colours Rectangle Crystal: 
http://www.aliexpress.com/item/100pcs-lot-6x8mm-Mix-Color-Crystal-Rhinestones-Rectangular-Octagon-Glass-With-Metal-Claw-Settings-Sewing-On/1591561772.html

Clear Coloured Oval Crystal: 
http://www.aliexpress.com/item/Wholesale-5x10mm100pcs-lot-Flatback-Clear-Marquise-Crystal-Diamond-With-Metal-Claws-Settings-4-Holes-Sew-On/1811471669.html

Tuesday, 15 July 2014

Spotlight Haul


This week Spotlight, an Australian bed, bath and craft superstore, opened their first store in Malaysia. No biggie... just 50% discounts on sewing machines that's all. 

Needless to say, I shopped. The place is amazing for craft supplies especially for those into sewing. I bought two types of scuba (neoprene?) fabric that I've been seeing everywhere and hopefully will make these into something wearable. I don't know how to sew but I've been thinking about learning and getting a simple sewing machine for a while now.This sewing machine normally costs over RM800; I purchased it for RM549 :O

I'm thinking though that some things are pretty pricey maybe because they bring in aussie brands. Thank goodness for the SALE! 

Things I would get here: 
Fabric (they have a more modern prints and fabric selection than places like Kamdar)
Party supplies (they have a bigger selection of cute things like chinese takeout boxes and cheap things like paper straws for RM8/20pc)
Assorted washi tape, ribbon, twine packs 

Things I would not get here:
Certain basic art supplies (some things like Mod Podge and Stretched Canvases are cheaper at Art Friend*)
Bed and Bath supplies (mainly because I think IKEA is cheaper and I don't mind their quality)

*I saw a sign that said they would match the price of any item found to be cheaper elsewhere. Need to check if this is true for all items or just the fabric.


I have so much hope for this fabric. Please be wonderful.


Assorted ribbon packs with all the mandatory colours and patterns.


Washi tape! Really good price I think.


More ribbon and baker's twine packs. 


My 1.5 metre cut of Scuba Knit in a bright aqua blue.


Iron-on patches. Probably the most adorable and overpriced thing we bought. 

Friday, 14 February 2014

Cuisinart ICE-21 Review


I got a new Ice Cream Maker!! About a year ago I bought a Kenwood IM280 Ice Cream Maker. It worked OKAAYY but it wasn't great. Almost every batch of ice cream came out looking like cold sludge instead of the soft-serve consistency promised on the manual. WHYYYYYY?! I concluded that the machine simply wasnt made for our weather and sought out a better one.

The Cuisinart is not available in Malaysia but I got my mum to bring one back with her from the U.S. 

It's amazing. Just amazing.


The machine is extremely simple. It has four parts: the base which houses the motor, a clear plastic cover, the plastic paddle and a freezer bowl. Basically the same as the Kenwood except that the freezer bowl on the Cuisinart seems to be made of a different material. The Cuisinart freezer bowl is filled with some kind of liquid that you can hear sloshing around when it's warm. The Kenwood on the other hand doesn't as far as I can tell. I don't hear any liquid sloshing around even when its been sitting out of the fridge all day. I suspect this is the crucial difference which allows the Cuisinart to freeze liquids quickly to an almost solid state versus sweet sludge.

The one problem with the machine is the need for a Step Down Transformer. Because American machines are made for 120 volts whereas our plug points discharge 240 volts (or something), I had to get a transformer from ACE Hardware which was expensive and looks completely hideous. Bah.


Anyway, I made a custard based ice cream beforehand. This is it after having been in the refrigerator over night. Its already very thick and has a mousse-y consistency. I dump this in the Cuisinart!


The ice cream is a dark chocolate malt flavour so I crush some Malteser balls and throw them into the machine too.


Scraping some frozen ice cream off the sides

15 minutes later-------Tadaa! Soft Serve ice cream that I had to scoop out with a spoon. YUMMM.
With the Kenwood, I almost always poured the soupy cream out directly into a bowl. I'm happy now.

Overall, the Cuisinart ICE-21 is a better ice cream maker for our K.L/Malaysian weather. 

Freezing

The freezer bowl is colder and can churn ice creams with low egg and fat content. The Kenwood worked well enough with custard style ice creams with loads of eggs and heavy cream but wasn't able to turn out a smooth ice cream which didn't have lots of heavy cream and eggs in it. The Kenwood also tended to melt very quickly and by the 20th minute, the bowl begins to sweat and if left any longer the ice cream actually starts to get softer rather than harder. The Cuisinart on the other hand stays frozen for much longer and may even be able to handle two batches back to back. 

Size & Capacity

Both machines have a 1.5 litre capacity which is more ice cream that my family can eat most of the time. But the Cuisinart bowl is actually more compact and so doesn't use up as much space in my freezer.

Speed

Because the bowl is colder (and maybe because the bowl and not the paddle turns) it actually freezes much faster than the Kenwood. My custard ice cream only took about 10 mins in the bowl. Using the Kenwood, it generally took at least 20mins to get to a stiff enough consistency.

Thursday, 5 December 2013

The Hunt for Milk Bottles in Malaysia


My precious. Milo Ais has never been this fancy


I FOUND IT! If you live in Malaysia and you've been looking for milk bottles then you understand why this is a big deal. After endless "where to buy milk bottles in Malaysia?" google searches ... here it is. This is the closest I've been able to come so far to a classic glass milk bottle shape. 

This bottle is perfect! It looks just like a vintage bottle, it's just the right size (250ml), and most importantly it's affordable. You can buy a more vintage look milk bottle from TYPO but it'll cost you RM10 for ONE! Assuming you have a party for 20 that's RM200 just for bottles. I cannot.

TYPO's RM10 milk bottle 
http://shop.cottonon.com/shop/product/milk-bottles-clear/ 

The bottle I found costs RM1 with a gold lid (no photos of the lid because I chose not to buy it) or 80sen without. The only catch is you have to buy at least 20 at a time. I'm still searching for a cheaper bottle, but until then, I'm ecstatic I found this. Will use them for our Christmas party and my sister's sweet sixteen!

You can purchase this milk bottle from a supplier called Polyclass. They have a store under the name Glass and Plastic Packaging Sdn Bhd in Petaling Jaya. They sell many other glass and plastic containers as well but they are generally a lot more expensive and certain things can be bought elsewhere for much cheaper. This bottle though I haven't been able to find anywhere else.

I-83-G, Jalan Teknologi 3/9, Bistari De Kota,
Kota Damansara, PJU 5,

47810 Petaling Jaya.
03-6141 6856
Google Map

They've moved! I hope they still have these in stock. The new address:

3A OMNI Kota Damansara,
Lorong Teknologi C (Off Jalan Teknologi)
Taman Sains Selangor 1, PJU 5,
Kota Damansara, 47810 Petaling Jaya.

03-6143 6942 

Friday, 29 November 2013

The Hunt for Homemade Cosmetics Supplies

There are about a gazillion recipes on Pinterest for homemade body products and with Christmas coming around the corner, it's the perfect time to try a couple out. In this post, I'm going to tell you where to find some of the ingredients you'll need to make a homemade body butter. Luckily, you can get them all from stores and suppliers in Malaysia.


The first and most important ingredient you're going to need to make your body butter is BUTTER (WHAT?!). Shea butter or Cocoa butter are the most popular types and are called for in nearly every recipe I've seen. The best kinds are raw and unrefined, meaning there's absolutely no additives or chemicals in them. Unfortunately, they're not available at just any supermarket and they can be really pricey! I got my Shea Butter for RM112/kg and my Cocoa Butter for RM16.90/700g but the prices range depending on where you get them.

You can buy Cocoa Butter from:
House of Ingredients (I got mine here and it is a deodorised kind)
Soap Story (unrefined - RM70/500g)

You can buy Shea Butter from:
Pameri Organic Malaysia (I got mine here. More expensive but organic. They don't have a storefront but give Diana a call and you can arrange to collect it at their office in Empire, Subang)
Soap Story (unrefined - RM70/kg)
Soap Artisan (unrefined - RM76/kg)


The second must-have ingredient you'll need are carrier oils. Coconut oil, grapeseed oil and avocado oil are all commonly used. I've also seen some recipes that use Extra Virgin Olive Oil which is great because you probably have a bottle of that lying around already. These oils are much easier to source and require only a quick trip down to the supermarket.

You can buy these oils from:
Cold Storage (prices range from RM22-RM59 per bottle)
Soap Story & Soap Artisan (Coconut and Grapeseed oil are cheaper here though probably not organic)

If you're looking for something a little more advanced, you can buy these and rarer oils like Sweet Almond from Soap Story and Soap Artisan, Publika. Soap Artisan has an online store now too (!) but I think they charge less in store.


Most recipes also call for extra ingredients to make your amazing homemade body butter even more amazing. Some of these are easy to find.

You can buy Vitamin E oil from just about any small health store or pharmacy. I forget the name of the place I got mine but I'm certain you can find it at Caring Pharmacy or Watsons. This little bottle cost about RM40 I think.

Essential oils add scents to your body butter and may also have other beneficial properties. You can buy essential oils from lots of places including RM5 stores like Daiso. I'm not sure about the quality though and I don't trust some cheap ones not to be watered down or padded up with random chemicals. I managed to find these in my mum's makeup drawer but I would buy mine from Soap Artisan or Soap Story (RM12-RM30+) if I had to.

Beeswax helps thicken the body butter and prevents it from melting into an oily puddle. If your butter seems to be doing that, you might consider adding beeswax into the mixture. You can purchase beeswax from Soap Artisan for RM8.50/100g. They also have larger quantities.


If you're a math person, you'll have realised the ginormous sum you'll have to part with for this DIY project. But think about how many you could make with all of this and all the money you might save on gifts. I'll never buy another product from L'Occitane or Body Shop again.

Do you know other stores/suppliers for these items?